\ 迷ったらまずTechAcademyの無料カウンセリング! /
Python+VSCode+Windows11の環境構築!初心者必見
Pythonは2023年時点において,世界で最も人気なプログラミング言語です
AI・機械学習やデータ分析ではライブラリが充実していることで非常に扱いやすく,さらに初心者でも理解しやすいというメリットも兼ね備えています
しかし,最初の環境構築は初心者が最もつまづく難所でもあり,どの環境が最も良いのかは全くわかりません
本記事では研究者としてPythonを使い続けている私の独断と偏見で,最もシンプルでAI開発に最適なPythonの開発環境構築について解説します
Python 3.11とVisual Studio Code,Windows11 (64bit)を使って,20分で完了するシンプルで最強なPython環境構築を行います
Anacondaでデータ分析に特化した環境構築をしたい方は下記記事を参考にしてください
あわせて読みたい
Anaconda+VSCode+Windows11の環境構築!初心者必見
Pythonでデータ分析を行うことは様々なメリットがあり,圧倒的な速度向上,新しいデータ分析法の即時導入,膨大な量のデータ収集などがあげられます しかし,最初の環境…
目次
Python開発環境の構成
Pythonの開発環境で最もおすすめなのが,テキストエディターのVisual Studio Code (VSCode) を組み合わせることです
VSCodeはPythonのコードを書く,実行,エラー修正のすべての機能が含まれています
他のテキストエディターと比較して,非常に軽量でサクサク動くことが圧倒的なメリットです
シンプルなPython開発環境
- Python
- IDE・テキストエディタ
- OS
Pythonを導入する
Pythonの導入は下記手順だと5分で完了します
Python導入手順
- Pythonインストーラーのダウンロード
- Pythonのインストール
- コマンドプロンプトによるPythonの動作確認
① Pythonインストーラーのダウンロード
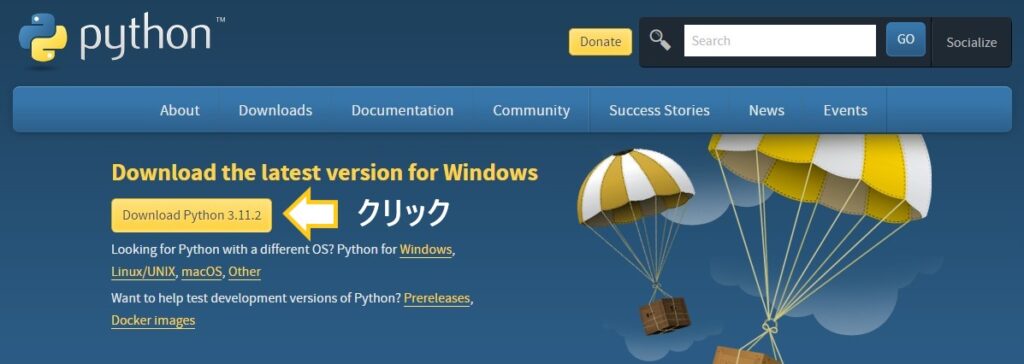
Pythonの公式サイトからダウンロードを行います
下記リンクから公式サイトにアクセスし,最新版のPythonをダウンロードしましょう
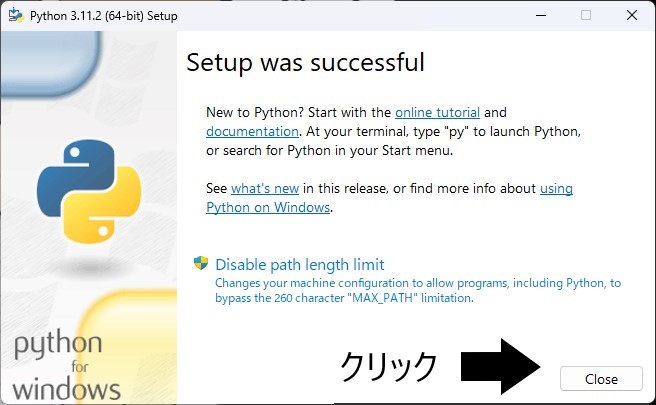
② Pythonのインストール
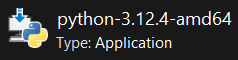
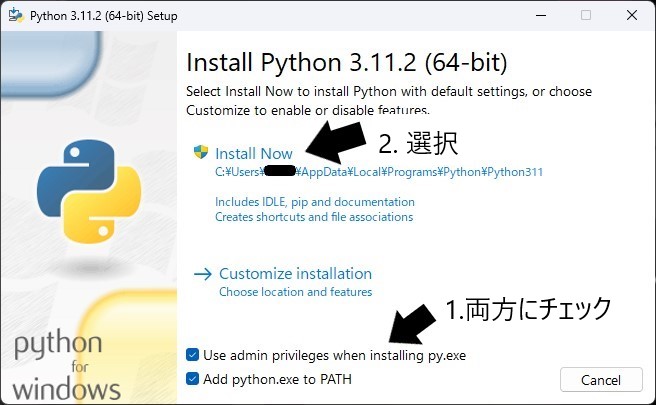
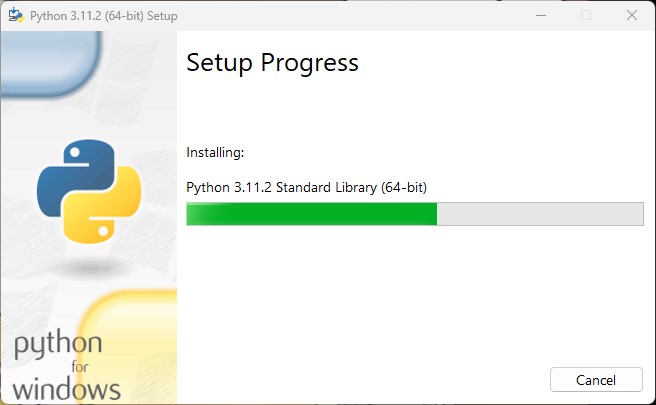
ダウンロードしたインストーラーをダブルクリックもしくは右クリックから実行でインストールします
あとは下記画像の通りに進めてください
③ コマンドプロンプトによるPythonの動作確認
Pythonのインストールが完了したら,コマンドプロンプトからPythonが正常にインストールされたかどうかを確認します
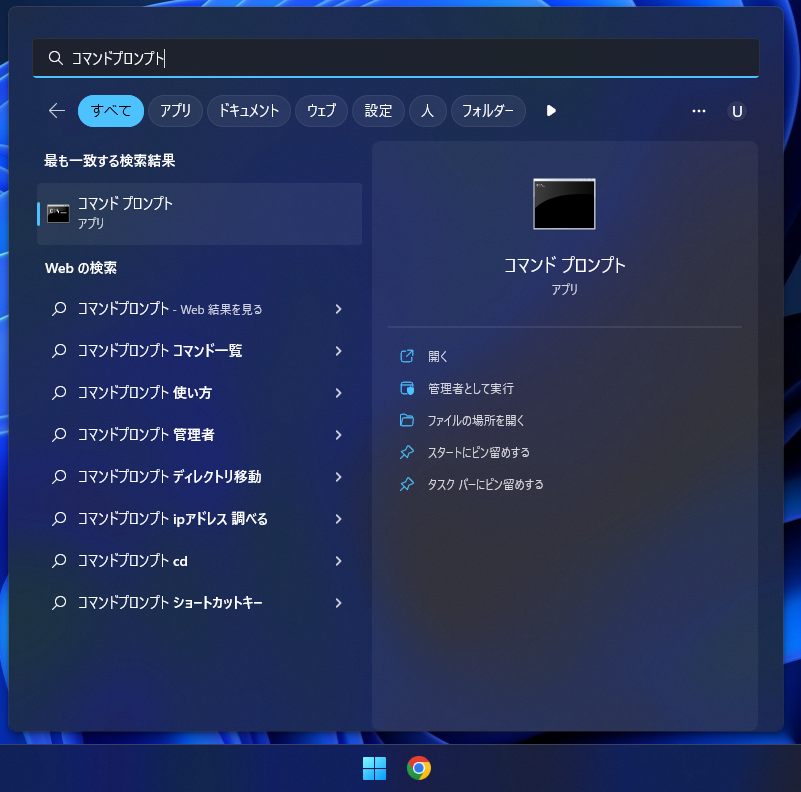
タスクバーのWindowsマークをクリックし,コマンドプロンプトを起動します
python -VPython 3.11.2とバージョン情報が返ってきたら,問題なくインストールできています
Visual Studio Codeを導入する
VSCodeの導入は下記手順だと5分で完了します
VSCode導入手順
- VSCodeインストーラーのダウンロード
- VSCodeのインストール
- VSCodeの起動確認
① VSCodeインストーラーのダウンロード
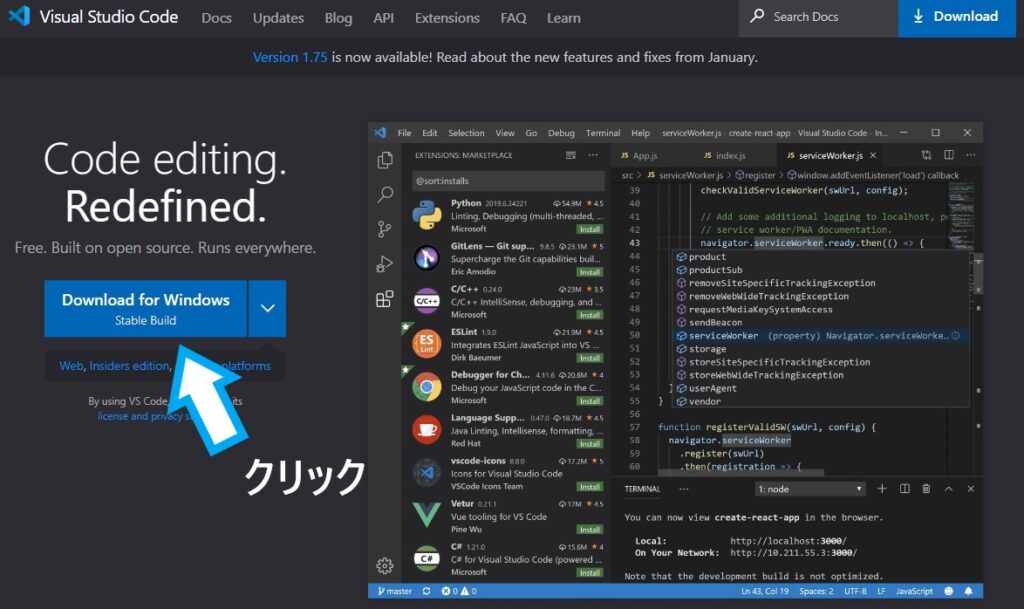
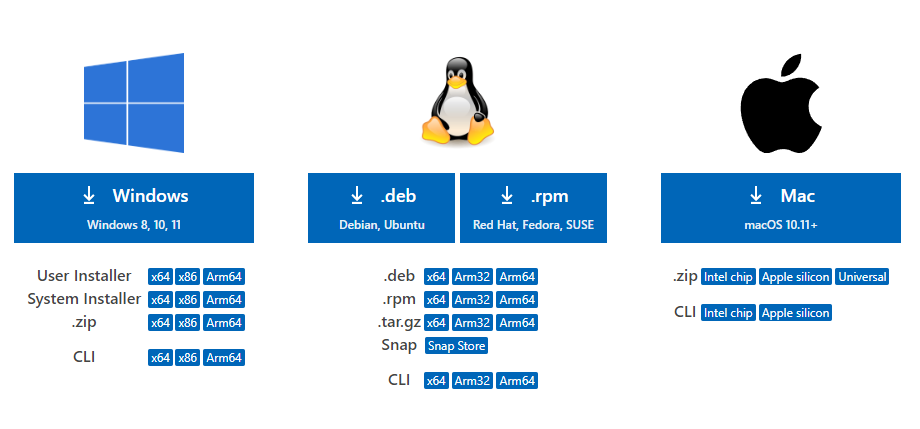
VSCodeの公式サイトからダウンロードします
下記リンクから公式サイトにアクセスし,最新版のVSCodeをダウンロードしましょう
もしWindowsの64bitではないという方は公式サイトトップページの下部に移動し,インストーラーを選択してください
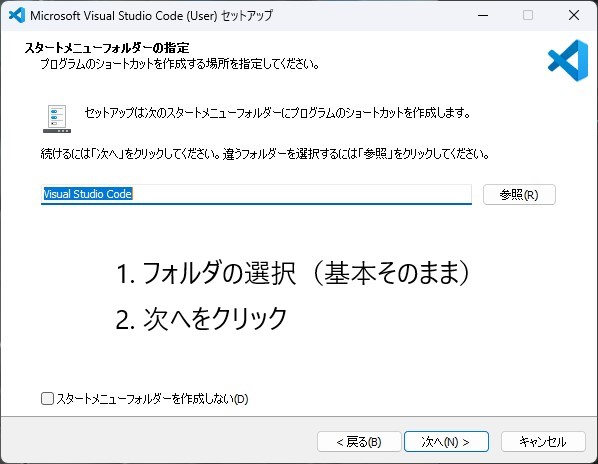
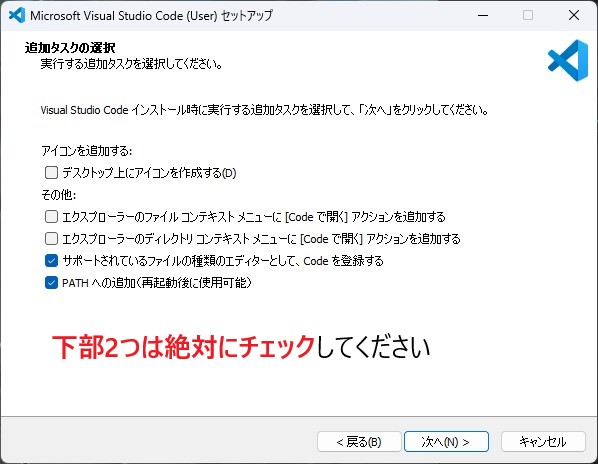
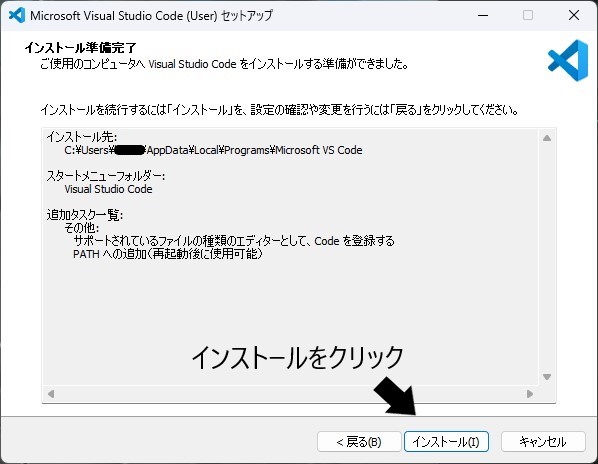
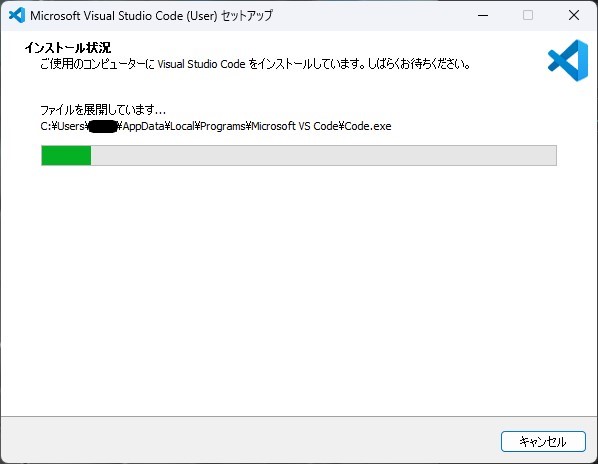
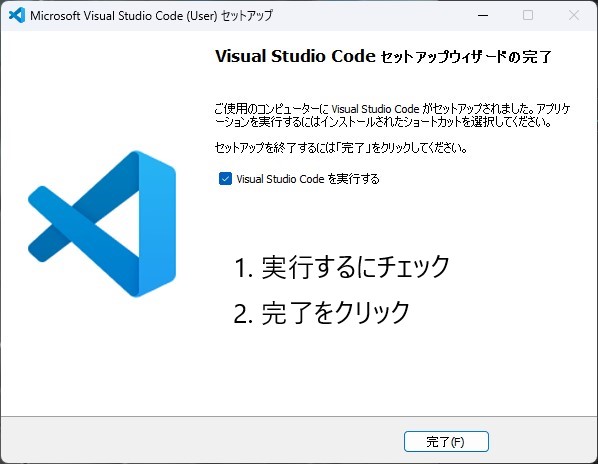
② VSCodeのインストール
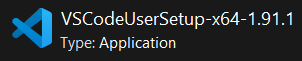
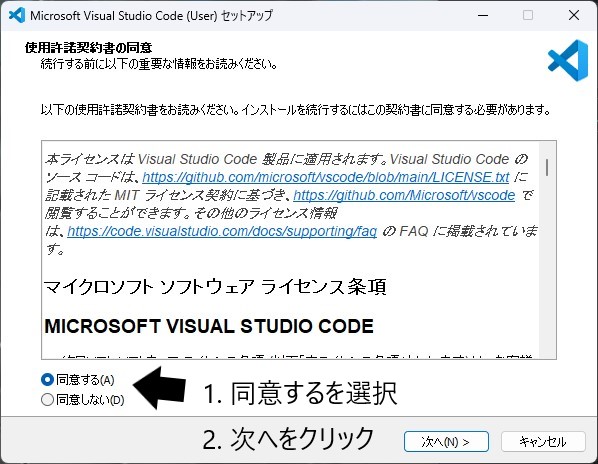
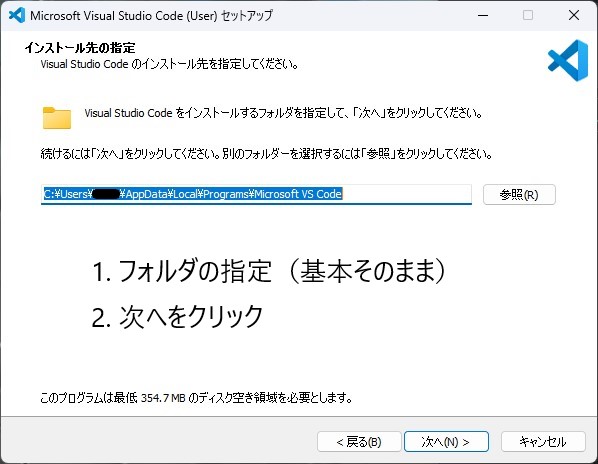
ダウンロードしたインストーラーをダブルクリックもしくは右クリックから実行でインストールします
あとは下記画像の通りに進めてください
③ PCの再起動
VSCodeのインストールが完了したら,PCを再起動してください
Visual Studio CodeでPythonを使う
Visual Studio CodeでPythonを使えるようにする作業は15分で完了します
Python+VSCodeの導入手順
- Python用の拡張機能を追加
- PythonのPathを設定
- Pythonおよびライブラリの動作確認
- pipによるライブラリのインストールとその動作確認
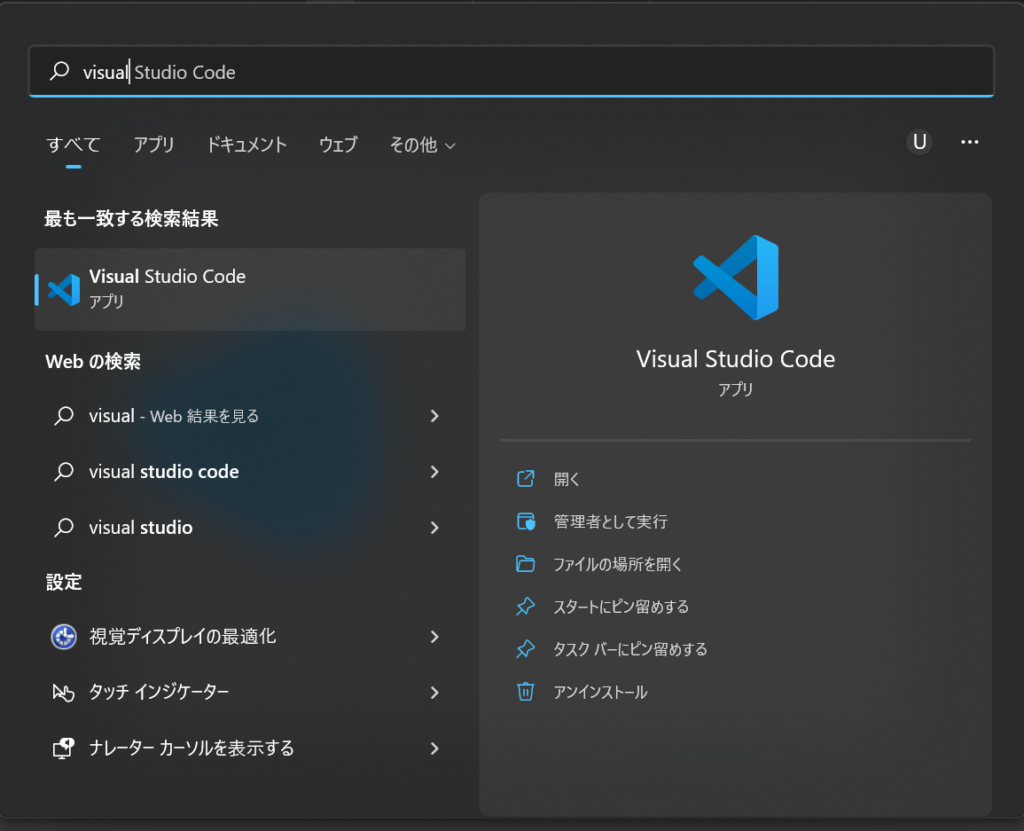
では,VSCodeを起動してから順番にやっていきましょう
タスクバーのWindowsボタンを押して,Visual Studio Codeと打てば起動できます
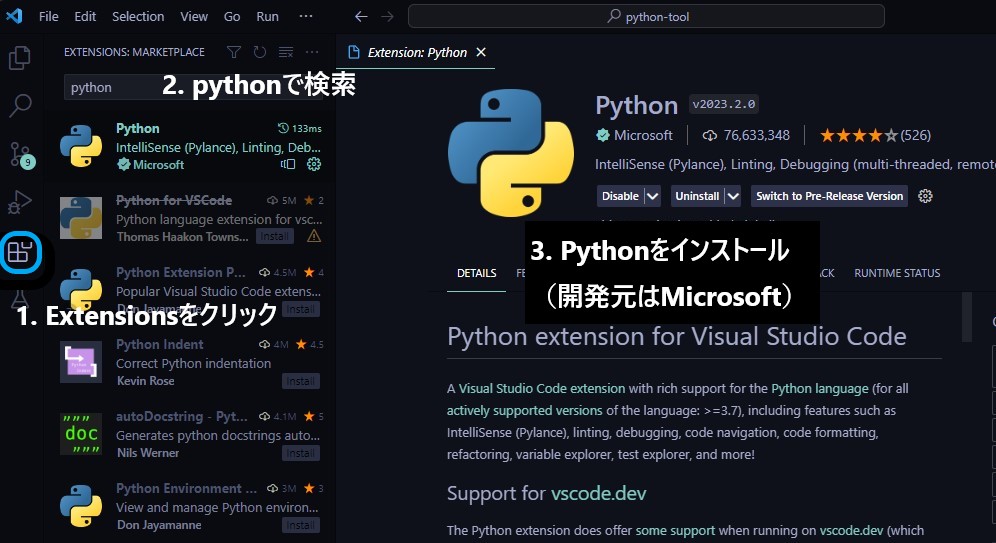
① Python用の拡張機能を追加
VSCodeは拡張パックを導入することで,機能を追加し便利にしてきます
Python extension for Visual Studio CodeというPython専用の拡張パックを導入します
あわせて読みたい
【VSCode】Pythonのためのおすすめ拡張機能5選まとめ
PythonのテキストエディタとしてVisual Studio Code(以下VSCode)を利用している方は非常に多いと思います VSCodeはMicrosoftが開発している無料のテキストエディタで…
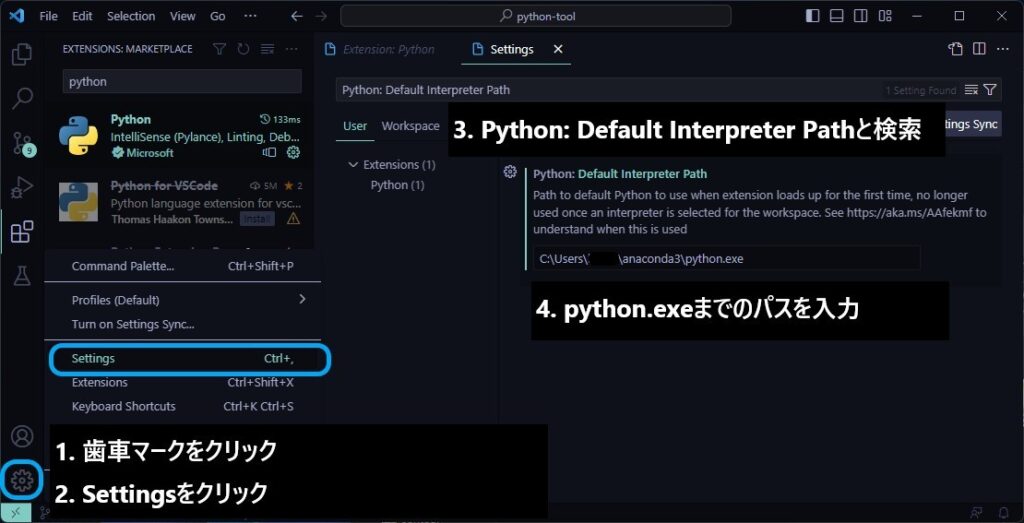
② PythonのPathを設定
Python: Default Interpreter Pathと検索し,python.exeまでのパスを入力します
python.exeの場所,パス取得方法は画像より下に記述しました
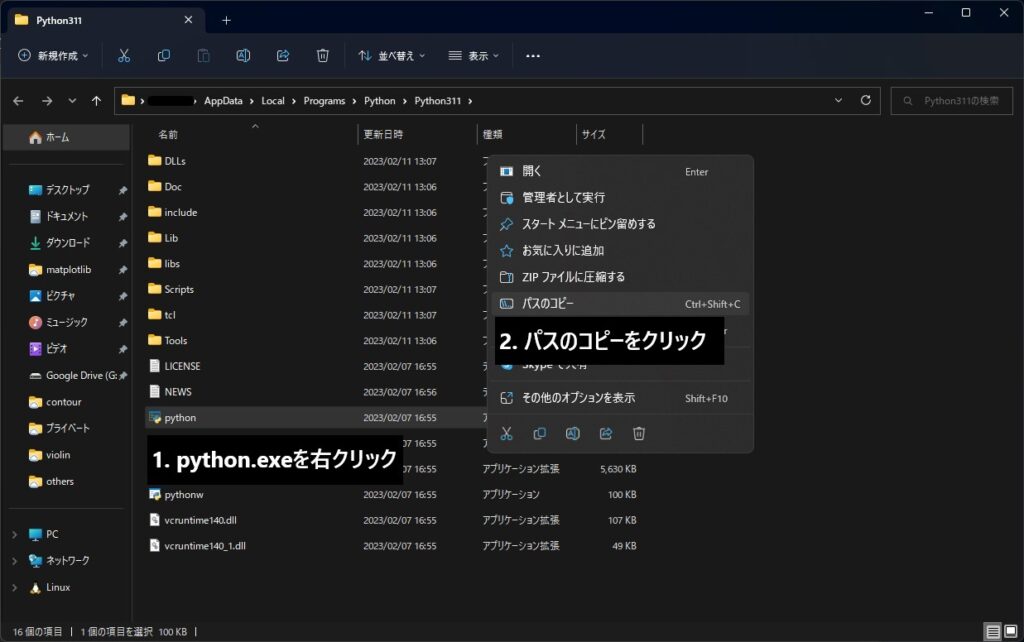
python.exeまでのパスの探し方
- タスクバーのWindowsボタンからファイルの場所を開きます
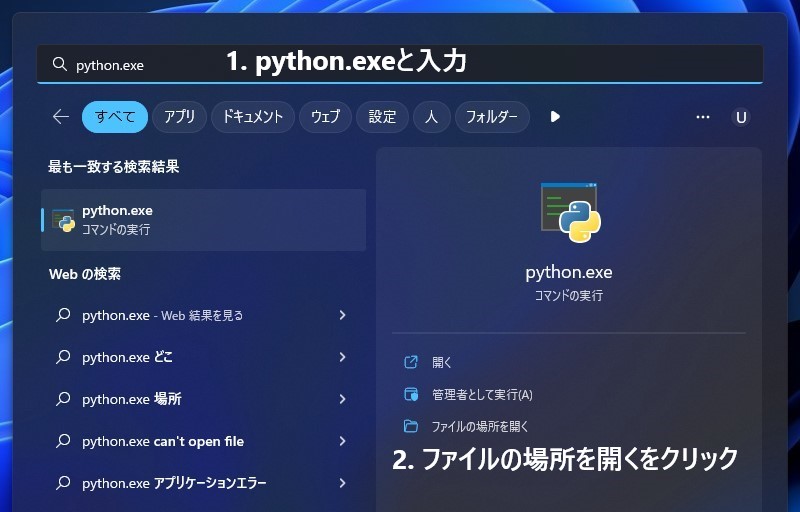
- python.exeを右クリックしてパスをコピーします(パスの“〇“は後で削除してください)
③ Pythonおよびライブラリの動作確認
Pythonファイルを作成して実際にVSCodeでプログラミングできるか試します
動作確認手順
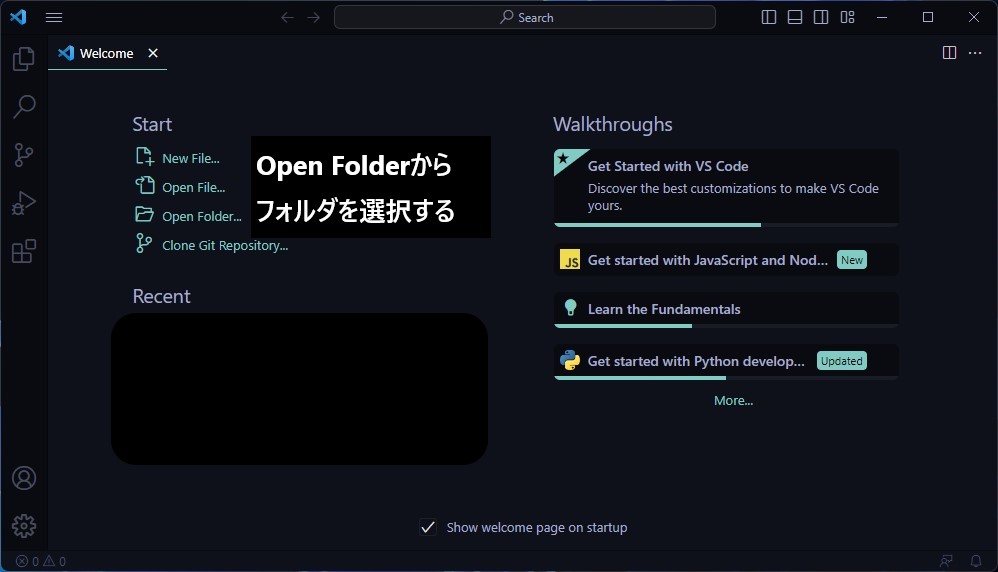
- フォルダを新たに作成する
- VSCodeでフォルダを開く
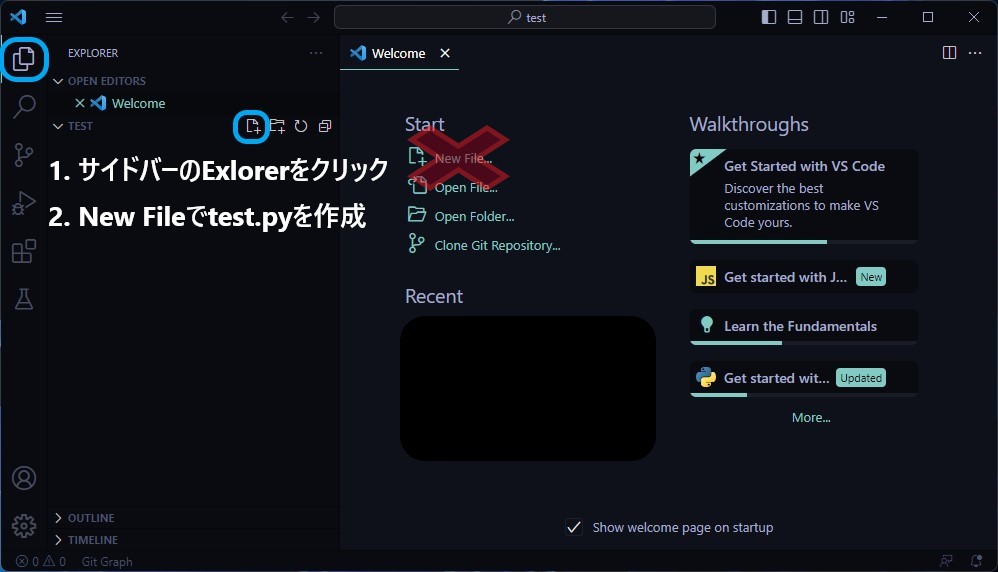
- フォルダ内にpythonファイルtest.pyを作成する
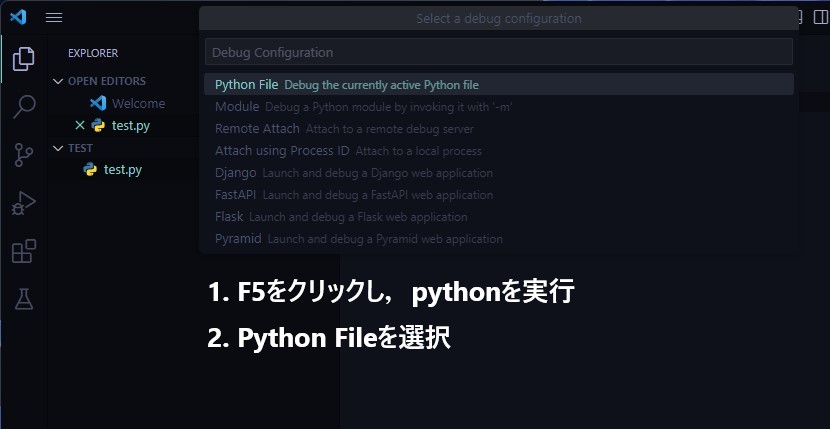
- コードを書いて,F5を押して実行する→Pythonの動作確認
- importを含めたコードをF5で実行する→ライブラリの動作確認
④ Pythonの動作確認
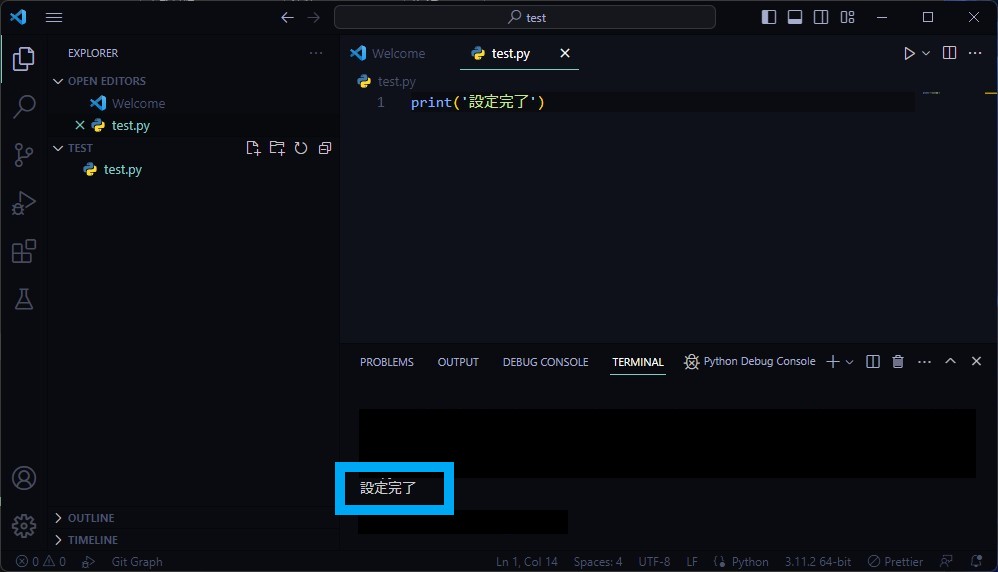
test.pyにコードを書いていきます
print('設定完了')上記のコードを書いてキーボードのF5か右上の三角マークを押してPythonを実行します
VSCodeの下部にあるTerminalで設定完了という文字が出力されるはずです
⑤ ライブラリの動作確認
test.pyにimport datetimeを加えて,コードを書いていきます
import datetime

print(datetime.datetime.today())

# 2023-02-11 16:51:22.854424上記のコードを書いてキーボードのF5を押してPythonを実行します
VSCodeの下部にあるTerminalで今日の日付,時間が出力されるはずです
④ pipによるライブラリインストールとその動作確認
最後にライブラリを追加して実行できるか確認します
AIでの計算に必ず使用されている数値計算用ライブラリのNumpyをインストールします
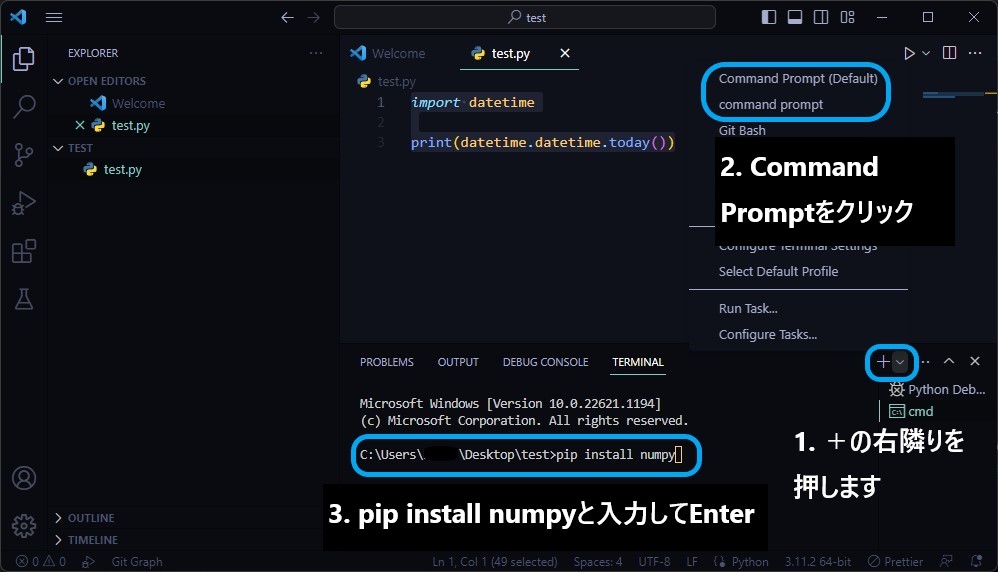
pip install numpy

///
Collecting numpy
  Downloading numpy-1.24.2-cp311-cp311-win_amd64.whl (14.8 MB)
     ━━━━━━━━━━━━━━━━━━━━━━━━━━━━━━ 14.8/14.8 MB 930.8 kB/s eta 0:00:00Installing collected packages: numpy
Successfully installed numpy-1.24.2
///インストールに成功したら,numpyでコードを書いて実行します
import numpy

# 数値リストを作成
x = [1, 31, 56 , 74]
# sumで合計値計算
print(numpy.sum(x))

# 162
ここまで完了すれば,あとは自分の思うとおりに開発していくのみです
お疲れさまでした
参考文献
Python
Visual Studio Code
numpy